Each day, with my daily photo, I’ll try to post both the original SOOC photo and the final edit, along with a list of things I did to the photo to achieve the edit. Once a week I will go into detail on the editing process, I will basically walk you step-by-step through the full edit with me. Here is a preview of that. Enjoy. :o) I’ll be editing with CS3.
I don’t know about you, but I hate taking pictures in the gym at the boys’ school. My pictures just never ever seem to turn out right or even slightly usable. Last Friday the boys had their Multi-Cultural Christmas Program at school, and even though I knew the pictures would suck, I knew I had to at least try to take some. I have to imagine my photos look about like the pictures most parents take at school stuff. Grainy because of the low lighting and being too far to use a flash. Blurry because kids do not sit still – especially not en masse. And lastly, with that funny tint that all school gyms seems to give photos. I swear, when people are in the planning stages of creating gyms, they purposely make them in a way that gives you sucktacular photos.
 Here is the original photo, zoomed in 100% and cropped so that the focus is on Prince Wild. (Not the crop I plan to use – this is just to show you the graininess and details – or lack thereof) His grade covered Native American winter rituals and sang “10 Little Indians” (though he swore for two weeks it was “6 Little Indians” and the song went “1 little, 2 little, 6 little Indians. 6 little Indian boys and girls.”)
First things first, lets fix that Bob awful tint. It kinda makes me want to puke just a tad…
Go to Layer>New Adjustment Layers>Color Balance. You’ll want to pull each color set away from the color closest to your tint just a tad, and then the one that has the tint color in it (Magenta and Green in this case) move it in the oposite direction as much as possible without creating a new funky color problem.


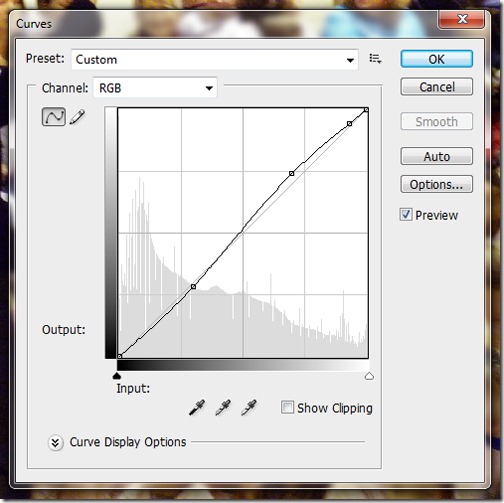
Now, lets adjust our lighting curves just a tad.
Go to Layer>New Adjustment Layer>Curves. Now, my lighting isn’t really all that bad, so as you’ll be able to tell in the image, I just barely adjusted them. The top of the curve is your highlight, mid is about the midtones (this will generally effect the overall lightness and darkness, not just parts, of the picture), and towards the bottom you have your shadows.

Select your background layer, zoom in 100%, then go to Filter>Noise>Reduce Noise. Remember this, you probably will not need as much of this part as I do, my photo is very grainy, and I have no intention of printing this photo at a large size. Reduce Noise is both good and bad, it reduces the noise (graininess) but you also lose some of your details and create a sort of flat look – especially if you use it a lot. This will not take a bad photo and make it great, it will take a bad photo and make it tolerable – or good if kept small.

I’m actually going to apply those settings to my photo TWICE. But look at it on the original size and then again on the size I plan to print at (100% SOOC size – 100% print size):


I’m decreasing the photo size a lot. The trick to figure out about how much detail will come in at print size is to get a tape measurer (or ruler) and zoom in/out of your picture until the width of the picture matches the width amount you’re printing at on the tape measurer.
That’s all I’m doing to this picture! :o) Here’s a split view of the SOOC and final edit.


