Monday, January 17, 2011

Playing catch up.

You can see why I haven’t been posting daily these past few days in the first picture below, but if you want more details click here.

TaS11211a
TaS11311a
TaS11411a
TaS11511a

(Pictures – the hubs truck after his wreck, Prince Zoo holding up his AB Honor Roll Ribbon from his report card, Princess Pudding in the van while we did tons of running around with the hubs to handle stuff dealing with the wreck, Prince Wild’s cupcakes from his birthday party)

As for the contests, last week’s winners will be up later today or early tomorrow as well as the next contest.

Tuesday, January 11, 2011

Day 11

Ohhh, so glad today is over. As in totally glad. Prince Wild is sick and since it’s very rare for him to get sick he’s completely miserable… and BORED. And driving me nuts trying to keep him entertained. Very much to my delight Prince Zoo took over entertaining his brother for a while tonight by reading him “Green Eggs and Ham” … with very very little help.

SOOC, Prince Zoo reading, January 11, 2011

Editing – Layer Adjustments (Brightness/Contrast, Levels, Color Balance) and spot sharpening

Special Edit – On the Spot Studio’s Bad Black and White 13 action from her Bad Black and White action set.

(click images to see the full size images)

Also, don’t forget to get your entry in for the Adorable You Photo Contest!

Monday, January 10, 2011

Day 10

We got snow last night so schools were closed in my county. Got some cute snow pictures, but the one I’m going to walk you through editing is actually from indoors. Click here to read more about our snow day and see additional pictures.

The picture is of Princess Pudding watching Prince Wild (and Zoo too though he isn’t in the picture) playing in the snow in the backyard today. Here’s the picture SOOC – no flash:
 

Now, I’m going to edit this picture with the focus of the edit being on the view out of the glass, not in front of it. But first thing’s first let’s fix the color:

As I’ve mentioned several times before I use adjustment layers – not image adjustments, this gives you more flexibility if you want to go back ad tweak an adjustment later.
I’m going to work on the contrast, not worrying about how it affects Princess Pudding.
 

The focus of the picture is outside the glass, but even so the inside is a tad too dark for me so what I’m going to do is set select a small soft brush, set my color at a dark medium gray and making sure the white layer mask is selected, color carefully over parts of the picture. After I did that I cloned out Princess Pudding’s funky bit of hair that was sticking out in the back and then I’m done! (click for full size)

Special edit – On the Spot Studio’s All That Jazz action from the Modern Rock action set. (Click for full size)

Also, don’t forget to get your entry in for the Adorable You Photo Contest!

Days 7, 8, and 9

:sigh: I never thought how difficult it would be to keep up with a daily blog over the weekends… especially when one of those days was my own birthday. lol The 7th was my 24th birthday. For some reason 24 sounds much more grown up to me than 23 – yeah stupid logic I know. lol The day for the 7th is my birthday present from the hubs… yeah I’m an uber-dork. There aren’t originals to go with the edits because a. I’m lazy and b. as soon as I finish this post I’m typing up a step-by-step post to go with today’s (the 10th) picture. :o) So, enjoy.

TaS1711a
TaS1811a
TaS1911a

Also, don’t forget to get your entry in for the Adorable You Photo Contest!

Friday, January 7, 2011

Photo Contest: Adorable You

The next four contests are being sponsored by a very talented lady, Astrid, of SIGnature Creations! Astrid makes some seriously adorable stuff for babies, toddlers, and children. And even more amazing… she does it with toddler triplets. Seriously, whoa. Astrid and I will each pick one winner each week and at the end of the 4 weeks we will have the 8 winners go into the poll for one of two prizes from Astrid! The prizes will be either a bow package (click to see her adorable bows) or a tie shirt (click to check out her tie shirts). Other than those two cute products she makes the most ADORABLE clothes. I ordered a dress from her for the Pudding, and while I must say I dress my daughter in some fabulous clothes, nothing has ever gotten more compliments than this dress.

TaS1611CONTEST
(trust me – you want to click that so you can see that pretty dress in full size)

Now… for the contest…

This week all you have to do is take a picture of your adorable child(ren)! Link it up to the list at the end of the post. The list will close at 11:59 pm CST January 14th and the winners announced shortly afterward. :o) Depending on the number of entries 2-4 other entries will also be spotlighted as additional favorites. Make sure you check out the contest rules before entering, and when posting it on your blog make sure you link back up to this post. For your picture viewing pleasure here are my adorable kiddos.

TaS1611CONTESTb
TaS1611CONTESTc
TaS1611CONTESTd

Day 6

(Yeah it’s a little late. lol) We spent all day at my mother’s yesterday babysitting, and then staying for dinner. The picture is of Princess Pudding playing with Prince Zoo’s backpack. lol It’s almost as big as she is.

SOOC – Princess Pudding, January 6, 2011

Editing – levels layer adjustment, selective sharpening, selective contrast and saturation adjustments

Special edit – My Four Hens’ actions Minced and Warmed (at 50%) from the Cook Book set.

(click them for full size)

Wednesday, January 5, 2011

Day 5

I’m going to walk you through this edit 100%. :o)

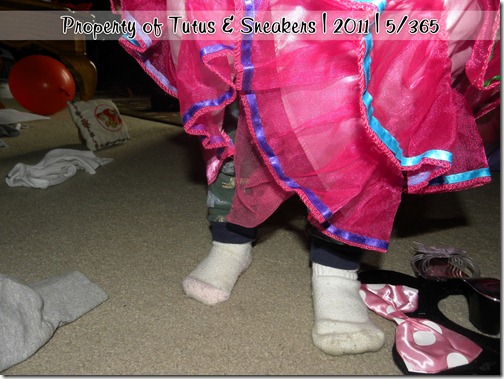
This is a picture of Princess Pudding playing today. (We spend lots of days like this – jammies and dress up dresses all day long lol) Gotta love a girl who wants to wear dinosaur jammies under princess dresses.

SOOC – Princess Pudding, January 5, 2011

First, let’s do Layers>New Adjustment Layer>Levels
TaS1511b

Next, Layers>New Adjustment Layer>Color Balance
TaS1511c

Photo after those:

If I wanted to do just plain ol’ editing I’d leave it at that, that is fine, BUT I want to do a tad more tweaking. First things first, I’m going to blur out some of the background. Duplicate your work window by going to image duplicate (this is so you mess up you can go back to this point easily). Merge all your layers and then duplicate the image. Go to Layer>New Fill Layer>Gradient. After clicking ok the gradient box will pop up, change your angle from 90 to –90. (Your angle changes from picture to picture by the way, you’ll figure out how to determine your angle as I go along). Move your duplicate image over the gradient, then right click the image and select create clipping mask. Making sure the image (not gradient) is still selected go to Filter>Blur>Lens Blur and then fool around with the settings until you get a blur you are happy with. Now merge your blurry image and gradient into one layer. Duplicate it, then hide one of the duplicates. (yes again, in case you mess up) Take the blurry image you have showing and carefully erase any pieces you don’t want blurry.
  

And there you go! That’s it! (click for full size) and here’s the special edit done with My Four Hens’ Grins and Giggles action from her Son Shine Collection. (click for full size)