Showing posts with label Prince Wild. Show all posts

Monday, January 17, 2011

Playing catch up.

You can see why I haven’t been posting daily these past few days in the first picture below, but if you want more details click here.

TaS11211a
TaS11311a
TaS11411a
TaS11511a

(Pictures – the hubs truck after his wreck, Prince Zoo holding up his AB Honor Roll Ribbon from his report card, Princess Pudding in the van while we did tons of running around with the hubs to handle stuff dealing with the wreck, Prince Wild’s cupcakes from his birthday party)

As for the contests, last week’s winners will be up later today or early tomorrow as well as the next contest.

Monday, January 10, 2011

Days 7, 8, and 9

:sigh: I never thought how difficult it would be to keep up with a daily blog over the weekends… especially when one of those days was my own birthday. lol The 7th was my 24th birthday. For some reason 24 sounds much more grown up to me than 23 – yeah stupid logic I know. lol The day for the 7th is my birthday present from the hubs… yeah I’m an uber-dork. There aren’t originals to go with the edits because a. I’m lazy and b. as soon as I finish this post I’m typing up a step-by-step post to go with today’s (the 10th) picture. :o) So, enjoy.

TaS1711a
TaS1811a
TaS1911a

Also, don’t forget to get your entry in for the Adorable You Photo Contest!

Monday, January 3, 2011

Day 3

Joy of joy, all my kiddos are back home. :o) I’m sure they’ll be back to driving me crazy soon again, but I’m just so happy to have them back home.

I got some great pictures of them while they were brushing their teeth tonight after dinner, but here’s my favorite one of the one and only Prince Wild.

SOOC – January 3, 2011, Prince Wild

Editing – layer adjustments: levels and color balance, clone out some of the tooth paste spots on the mirror the boys added, selective sharpening, and a few color and contrast punches. (click for full size)

Special edit – My Four Hens’ Koolaid Kisses from her Light and Bright action set at 75% opacity. Gives it a nice vintage look. (click for full size)

Monday, December 20, 2010

Preview Day 3 (an entry)

OK – so I’m editing this photo today for an entry to the Paper Mama’s Winter Photo Contest.
The Paper Mama
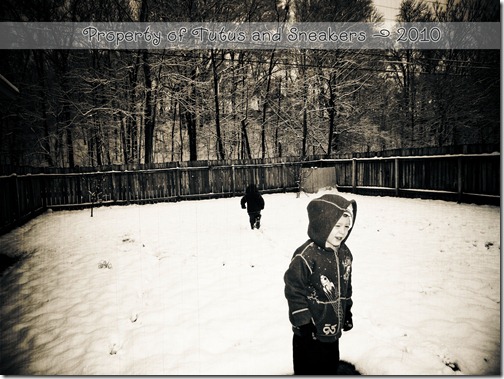
This photo is actually from February 2010, but a. I live in the South, have some pity on me, we don’t get it looking like winter too often outside and b. no SOOC shot, I was computerless at that point so I’m lucky to even have this version of the photo – and it has to be one of my favorite snow shots of the boyos ever.
Original I have – Prince Zoo & Prince Wild February 2010 (last photo is entry)
TaS122010a
Editing: apply texture at 40% opacity and blending mode of Color Burn, add gradient layer of 100% black at edges to 0% black at center, duplicate original photo and add a lens blur of 30 radius then clip into gradient then set gradient to Color Burn at 50%. (click to get full effect)
TaS122010b


Oh and back to add my bokeh photo for the Paper Heart Camera Bokeh Photos. :o) Click for full effect – and yeah it leads to my other Flickr account I’m just too lazy to upload it again. lol
DSCN9200
Don’t forget to come and enter the Christmas Time photo contest for your chance to win a $20 gift certificate!

Saturday, December 18, 2010

Preview Day 2 (fixing bags under eyes)

Hey Prince Wild, pout much? lol From yesterday 12/17.
SOOC

Love his under eye luggage? lol My boys are like me and constantly look completely worn out. So today we will go over how to fix some of those under eye bags.
First things first lets take care of some basic editing. The first thing I’ll do is take care of the lighting since that picture is rather on the dark side. Since the room we were in was dark I’m not going to worry about making the dark background visible, just brightening up his face. Go to Layers>Adjustment Layer>Curves:
TaS121910b

Next, lets fix the color balance. His skin and shirt has just a touch of a green tint so we’ll fix that by going to Layers>Adjustment Layer>Color Balance:
TaS121910cd

After this I’ll do skin softening, and eye pop, both of those tutorials can be found on The Coffee Shop blog.

The skin softening took care of some of the baggage, but it’s still there just a tad. So what we’ll do now is select the magnetic lasso, set the feather to 10 and use it to go around the worst parts of the bags. After they are selected press CTRL+J to put them in their own layer. Then go to Layers>New Adjustment Layer>Color Balance. Click OK without adjusting then select the adjustment layer in your layers and right click it and select create clipping mask into the layer with the bags. Double click the adjustment box and  move the sliders until you get a nice greenish tint.
TaS121910g
TaS121910h

Select the bag layer (not adjustment) and change your blending mode to Soft Light and set your opacity to somewhere between 20 – 40. (Mine is at 30)
TaS121910i
And that’s it I’m done! I’ll use the Healing tool to clean up his face some but that’s really it. Here’s a split view of SOOC and edit and then the full edit. :o)

Tuesday, December 14, 2010

A preview of things to come.

Each day, with my daily photo, I’ll try to post both the original SOOC photo and the final edit, along with a list of things I did to the photo to achieve the edit. Once a week I will go into detail on the editing process, I will basically walk you step-by-step through the full edit with me. Here is a preview of that. Enjoy. :o) I’ll be editing with CS3.
I don’t know about you, but I hate taking pictures in the gym at the boys’ school. My pictures just never ever seem to turn out right or even slightly usable. Last Friday the boys had their Multi-Cultural Christmas Program at school, and even though I knew the pictures would suck, I knew I had to at least try to take some. I have to imagine my photos look about like the pictures most parents take at school stuff. Grainy because of the low lighting and being too far to use a flash. Blurry because kids do not sit still – especially not en masse. And lastly, with that funny tint that all school gyms seems to give photos. I swear, when people are in the planning stages of creating gyms, they purposely make them in a way that gives you sucktacular photos.
TaS121410aHere is the original photo, zoomed in 100% and cropped so that the focus is on Prince Wild. (Not the crop I plan to use – this is just to show you the graininess and details – or lack thereof) His grade covered Native American winter rituals and sang “10 Little Indians” (though he swore for two weeks it was “6 Little Indians” and the song went “1 little, 2 little, 6 little Indians. 6 little Indian boys and girls.”)
First things first, lets fix that Bob awful tint. It kinda makes me want to puke just a tad…
Go to Layer>New Adjustment Layers>Color Balance. You’ll want to pull each color set away from the color closest to your tint just a tad, and then the one that has the tint color in it (Magenta and Green in this case) move it in the oposite direction as much as possible without creating a new funky color problem.
TaS121410c

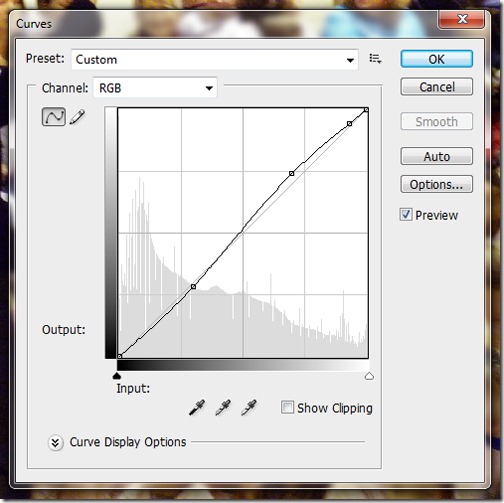
Now, lets adjust our lighting curves just a tad.
Go to Layer>New Adjustment Layer>Curves. Now, my lighting isn’t really all that bad, so as you’ll be able to tell in the image, I just barely adjusted them. The top of the curve is your highlight, mid is about the midtones (this will generally effect the overall lightness and darkness, not just parts, of the picture), and towards the bottom you have your shadows.
TaS121410e

Select your background layer, zoom in 100%, then go to Filter>Noise>Reduce Noise. Remember this, you probably will not need as much of this part as I do, my photo is very grainy, and I have no intention of printing this photo at a large size. Reduce Noise is both good and bad, it reduces the noise (graininess) but you also lose some of your details and create a sort of flat look – especially if you use it a lot. This will not take a bad photo and make it great, it will take a bad photo and make it tolerable – or good if kept small.
TaS121410g
I’m actually going to apply those settings to my photo TWICE. But look at it on the original size and then again on the size I plan to print at (100% SOOC size – 100% print size):
TaS121410h TaS121410i
I’m decreasing the photo size a lot. The trick to figure out about how much detail will come in at print size is to get a tape measurer (or ruler) and zoom in/out of your picture until the width of the picture matches the width amount you’re printing at on the tape measurer.
That’s all I’m doing to this picture! :o) Here’s a split view of the SOOC and final edit.